
Baking sourdough bread daily might sound like a daunting task, but with the right approach, it’s surprisingly manageable. In this article, I’ll walk you through my process for baking a sourdough loaf every day, showing you how I manage to fit it into my busy schedule and still have time for family and work commitments. The method is simple, effective, and doesn’t require hours of labor in the kitchen. Read on for a step-by-step guide to making delicious, homemade sourdough bread with minimal time investment.
Evening Starter Feed
Preparing the Starter
The first step in baking sourdough is feeding your starter. I typically do this while preparing dinner, which means it takes very little extra time. I use the starter left over from my previous bake—this is mostly just residue, but it still contains enough viable yeast to start a new batch.
To feed the starter, I add 55 grams of water and 55 grams of strong bread flour to the leftover starter. I mix it well with a spoon, cover the bowl loosely, and leave it at room temperature to ferment overnight.
Since I’m using a small quantity of starter for the feed, it takes longer to ferment, which works out perfectly for me. By the time I wake up the next morning, the starter is bubbly and ready to use, and the whole process takes just two minutes of active time.
Morning Dough Preparation
Mixing the Dough
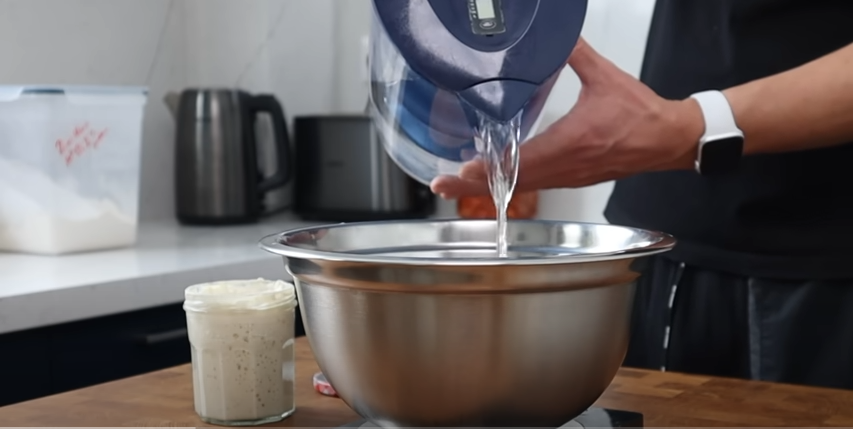
In the morning, I mix the main dough. I aim to have this done by 6:30 AM so I can take my daughter to the bus at 7:00 AM. I add 257 grams of room temperature water and 98 grams of the bubbly starter into a mixing bowl. After adding the water and starter, I mix the ingredients to break down the starter in the water. It doesn’t need to be completely dissolved, so I don’t worry if a few bits of starter remain.
Next, I add 8 grams of sea salt to the mixture and give it another quick stir. Then, I add 388 grams of strong bread flour to the bowl. The flour I use has a high protein content (around 13%), which helps create a strong, elastic dough.
Forming the Dough
After mixing everything together, I use my wet hands to bring the dough together. This step only takes about five minutes. The goal is to ensure there are no pockets of dry flour, and the mixture is well combined, though it doesn’t need to be smooth yet.
I cover the dough and let it rest for 5-10 minutes to relax while I go about my morning tasks.
Kneading and Shaping
Once the dough has rested, I flip it out onto the counter and knead it for less than a minute to smooth it out. I shape it into a rough ball, pop it back into the bowl, and cover it to begin bulk fermentation.
Bulk Fermentation and Stretching/Folding
Bulk Fermentation
At this stage, the dough will undergo bulk fermentation at room temperature. I typically let the dough rest for around six hours, giving me enough time to take my daughter to school and complete other tasks. If I need to extend the fermentation time, I can reduce the amount of starter I use, allowing the dough to ferment more slowly.
I use a technique called “stretch and fold” to develop strength in the dough without overworking it. After about 30 minutes of initial fermentation, I flip the dough onto the counter and stretch it into a circle. I work around the dough’s circumference, gently easing it out into a larger shape, which helps to relax the dough.
Once the dough has been stretched, I fold the sides into the center, one side at a time, and then fold in the corners to shape the dough into a neat ball. This helps build the structure and strength of the dough.
Shaping and Final Proofing
Pre-Shaping and Resting
After the dough has bulk fermented, I perform a quick pre-shape, rolling the dough into a ball. I then let it rest uncovered for 10 minutes on the counter to allow it to relax before shaping it for its final proofing.
Shaping for Proofing
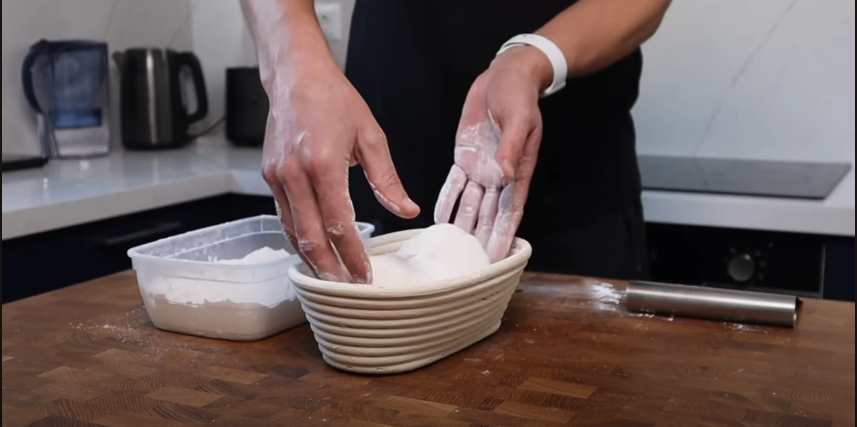
For the final shape, I gently roll the dough into a cylinder, tucking in the ends as I go. When I reach the end, I pinch the seam closed to seal it. I dust the dough lightly with rice flour, as it prevents sticking better than wheat flour. After this, I place the dough in a banneton basket and leave it at room temperature for about 90 minutes, allowing it to rise slightly.
Overnight Fermentation
Once the dough has risen, I place it in the fridge for its overnight fermentation. This extended fermentation helps develop deeper flavors and allows me to bake the bread the next day without any hassle.
Baking the Sourdough
Preheating the Oven
The next day, I preheat the oven to 220°C (430°F) for about an hour before baking. I also place a baking stone in the oven to ensure an even bake.
Scoring and Baking
Once the dough is ready, I take it directly from the fridge. The skin on the dough has formed, so I don’t need any additional flour to handle it. I score the dough with a clean, sharp blade, making a 45-degree cut from the center to the edge and then back around to the bottom. This creates a beautiful, open crumb when baked.
I place the dough into the preheated oven on the baking stone, cover it with a pot, and bake it at 220°C for the first 20 minutes. After that, I remove the pot and bake the bread uncovered for another 30 minutes.
Final Touches
While the bread bakes, I clean the banneton basket with a soft brush to remove any leftover flour. Once the bread has finished baking, I let it cool completely before slicing into it.
Time Commitment and Flexibility
The beauty of this method is that it only requires about 30 minutes of hands-on time each day. Most of the process happens while you’re going about your regular routine, and the dough is left to ferment on its own. This means you don’t have to spend hours in the kitchen to enjoy fresh, homemade sourdough every day.
With minimal active time required, I can balance baking with work and family commitments. If needed, you can adjust the fermentation times to suit your schedule, making it a flexible option for anyone with a busy life.
Conclusion
Baking sourdough every day is completely doable with the right process and mindset. By following a few simple steps and making use of fermentation times to fit into your daily routine, you can enjoy fresh sourdough without being chained to your kitchen. With this method, you can have a fresh loaf every morning and still maintain a busy schedule. Whether you’re a seasoned baker or a beginner, this technique is simple, efficient, and rewarding.
Ready to give it a try? Get started with this step-by-step guide and enjoy the delicious results!